WordPress is one of the most popular content management systems (CMS) available today, and cPanel is a widely used control panel for web hosting. This guide will walk you through the steps to install WordPress using cPanel.
Prerequisites
Before you begin, ensure that you have:
- Access to cPanel (credentials from your web hosting provider)
- A domain name
Step-by-Step Guide
Step 1: Log in to cPanel
First, log in to your cPanel account. You can usually access it by navigating to yourdomain.com/cpanel and entering your username and password.

Step 2: Find and Open the WordPress Installer
Once you’re logged in, scroll down to the Software section and click on WordPress under Site Software or Softaculous Apps Installer, depending on your hosting provider.
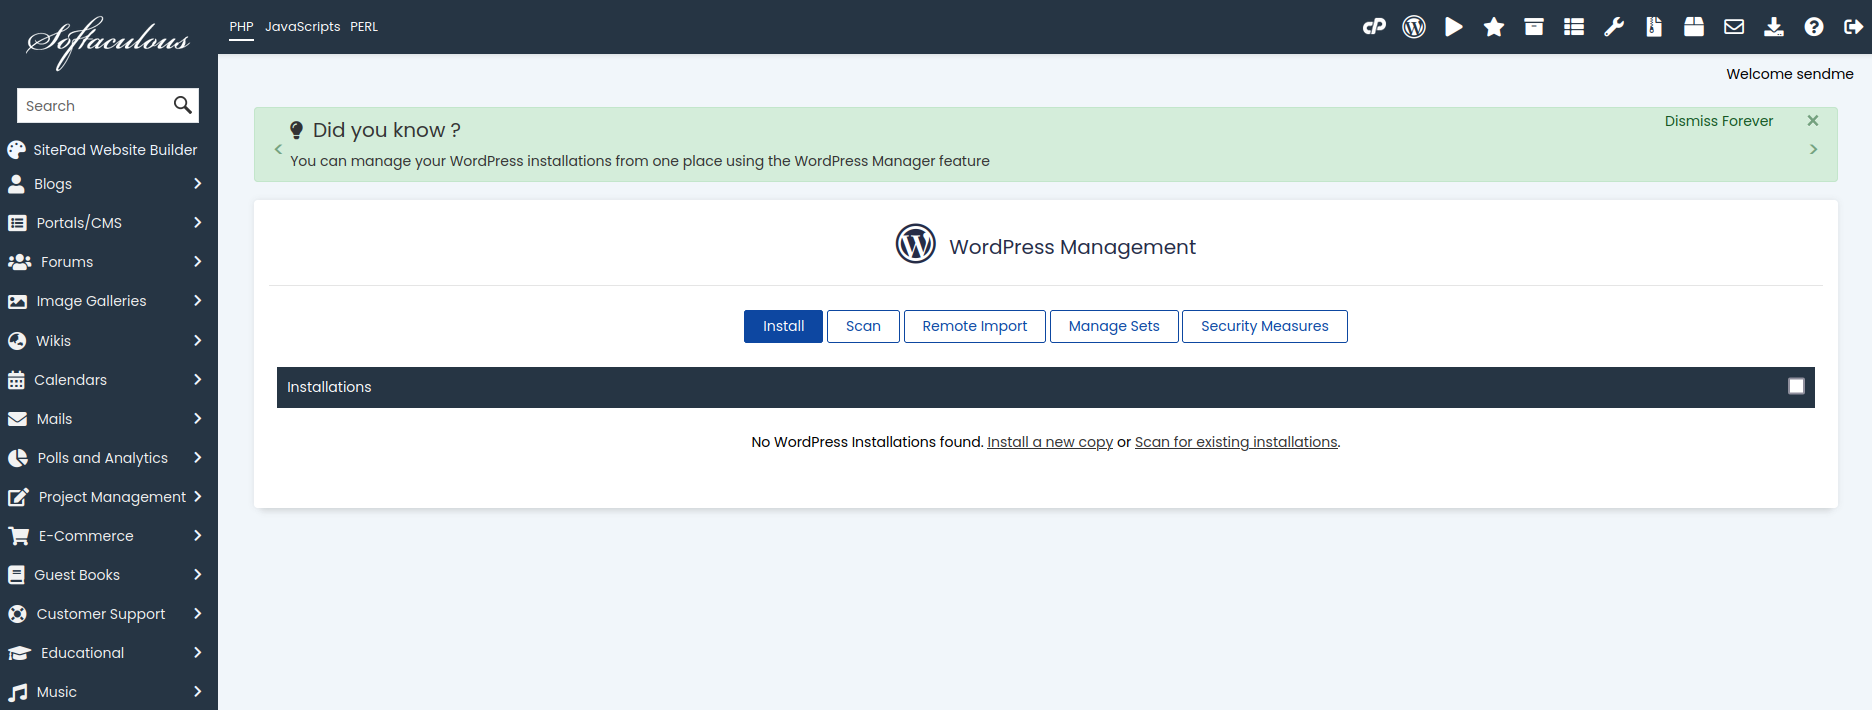
Step 3: Click on the Install Button
In the WordPress installer page, click on the Install Now button.
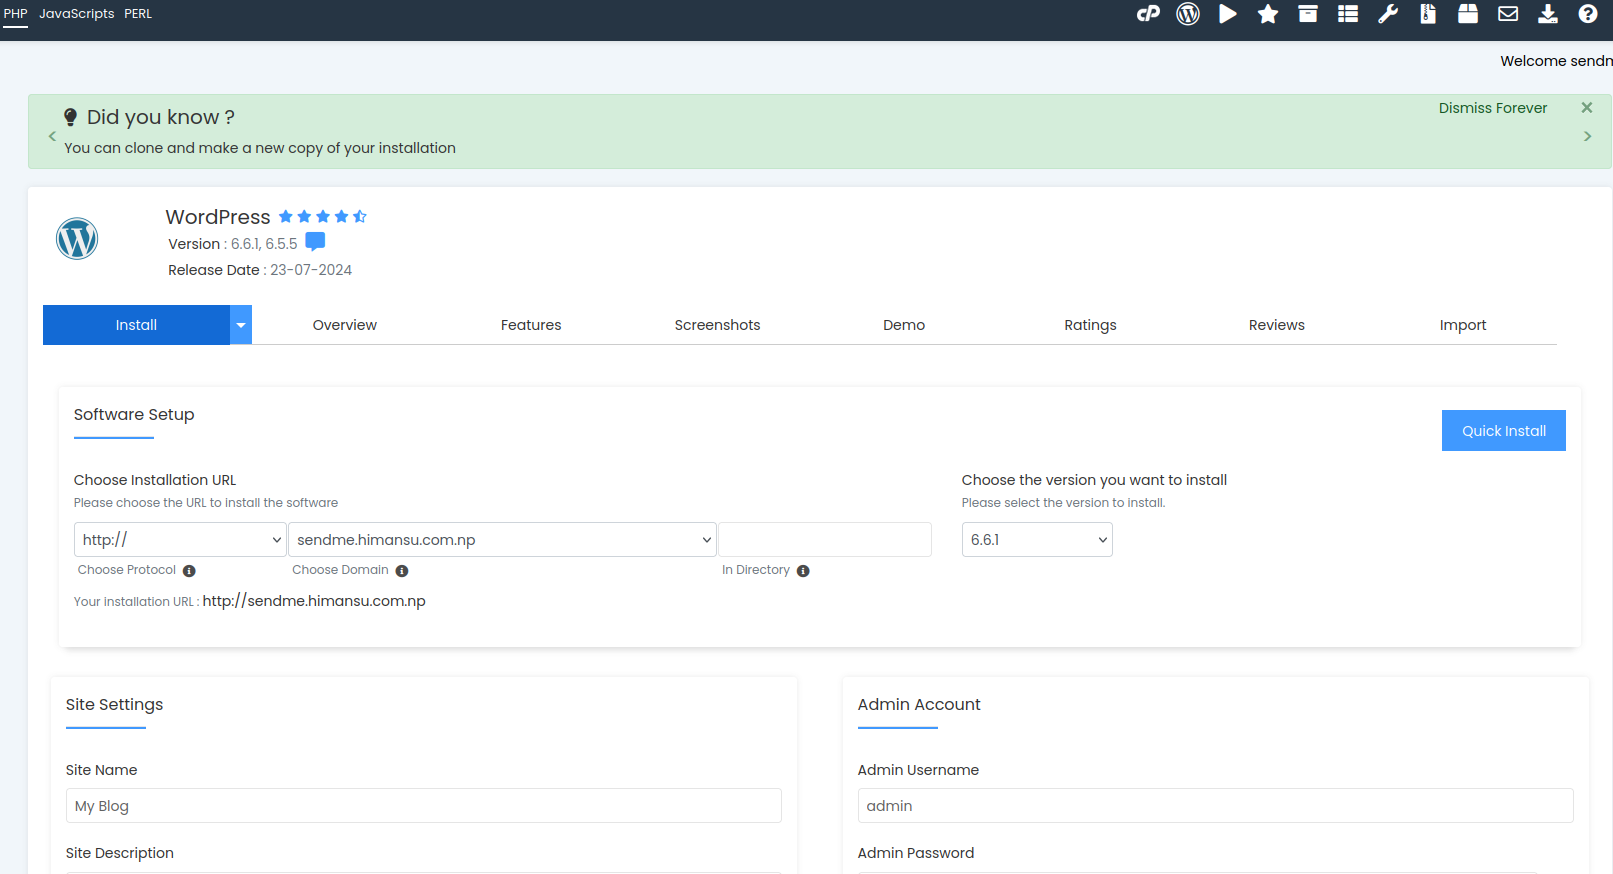
Step 4: Configure the WordPress Installations
Fill out the necessary details for your WordPress installation:
- Choose Protocol: Select
http://orhttps://depending on your SSL certificate. - Choose Domain: Select the domain where you want to install WordPress.
- In Directory: Leave this blank to install WordPress in the root directory, or enter a folder name if you want it installed in a subdirectory.
Site Settings
- Site Name: Your site’s name.
- Site Description: A short description of your site.
Admin Account
- Admin Username: Create a username for the WordPress admin account.
- Admin Password: Create a strong password.
- Admin Email: Enter your email address.
Database Settings
- Database Name: You can leave this as is or create a new database name.
- Table Prefix: Use the default
wp_or change it for better security.
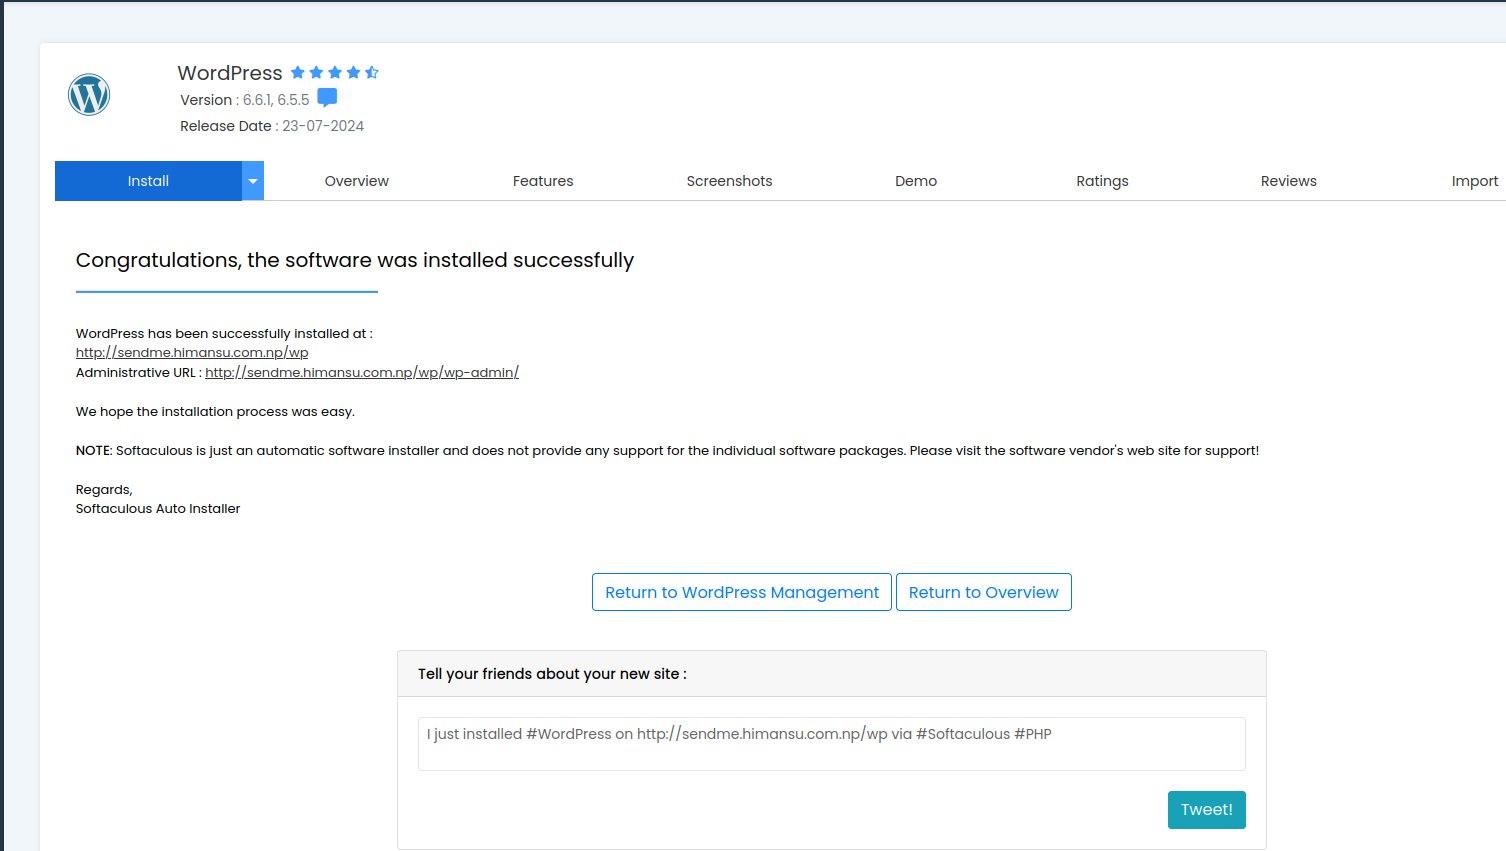
Step 5: Complete the Installation
After filling out the details, scroll down and click the Install button. The installation process will take a few minutes.
Step 6: Access Your New WordPress Site
Once the installation is complete, you will see a success message with the URL to your new WordPress site and the admin URL. Click on the links to visit your site and log in to the WordPress admin dashboard.
Conclusion
Congratulations! You’ve successfully installed WordPress using cPanel. You can now start customizing your site and creating content. If you encounter any issues, refer to the documentation provided by your hosting provider or the WordPress support forums.